Well, let's see...I'm a mommy and a wife that crafts on the little spare time I have...I tend to sleep late to get more crafting in...I think we all do that. I can almost never finish a single project start to finish...why? Because I come up with a way better project or idea and have to do it RIGHT NOW!!! Needless to say I have many projects unfinished, kind of all over my craft room (hehe). I love working with all sorts of supplies, paper, lace, pearls, paint, sprays…anything pretty much. I've yet to try many other wonderful supplies out there but one day I will…and will leave an unfinished project behind to start a new one…
A special card for a new friend on YouTube...Amador (amadoreros). Made with some Prima & DVWV paper, homemade doily flower, mulberry flower lace and trim...
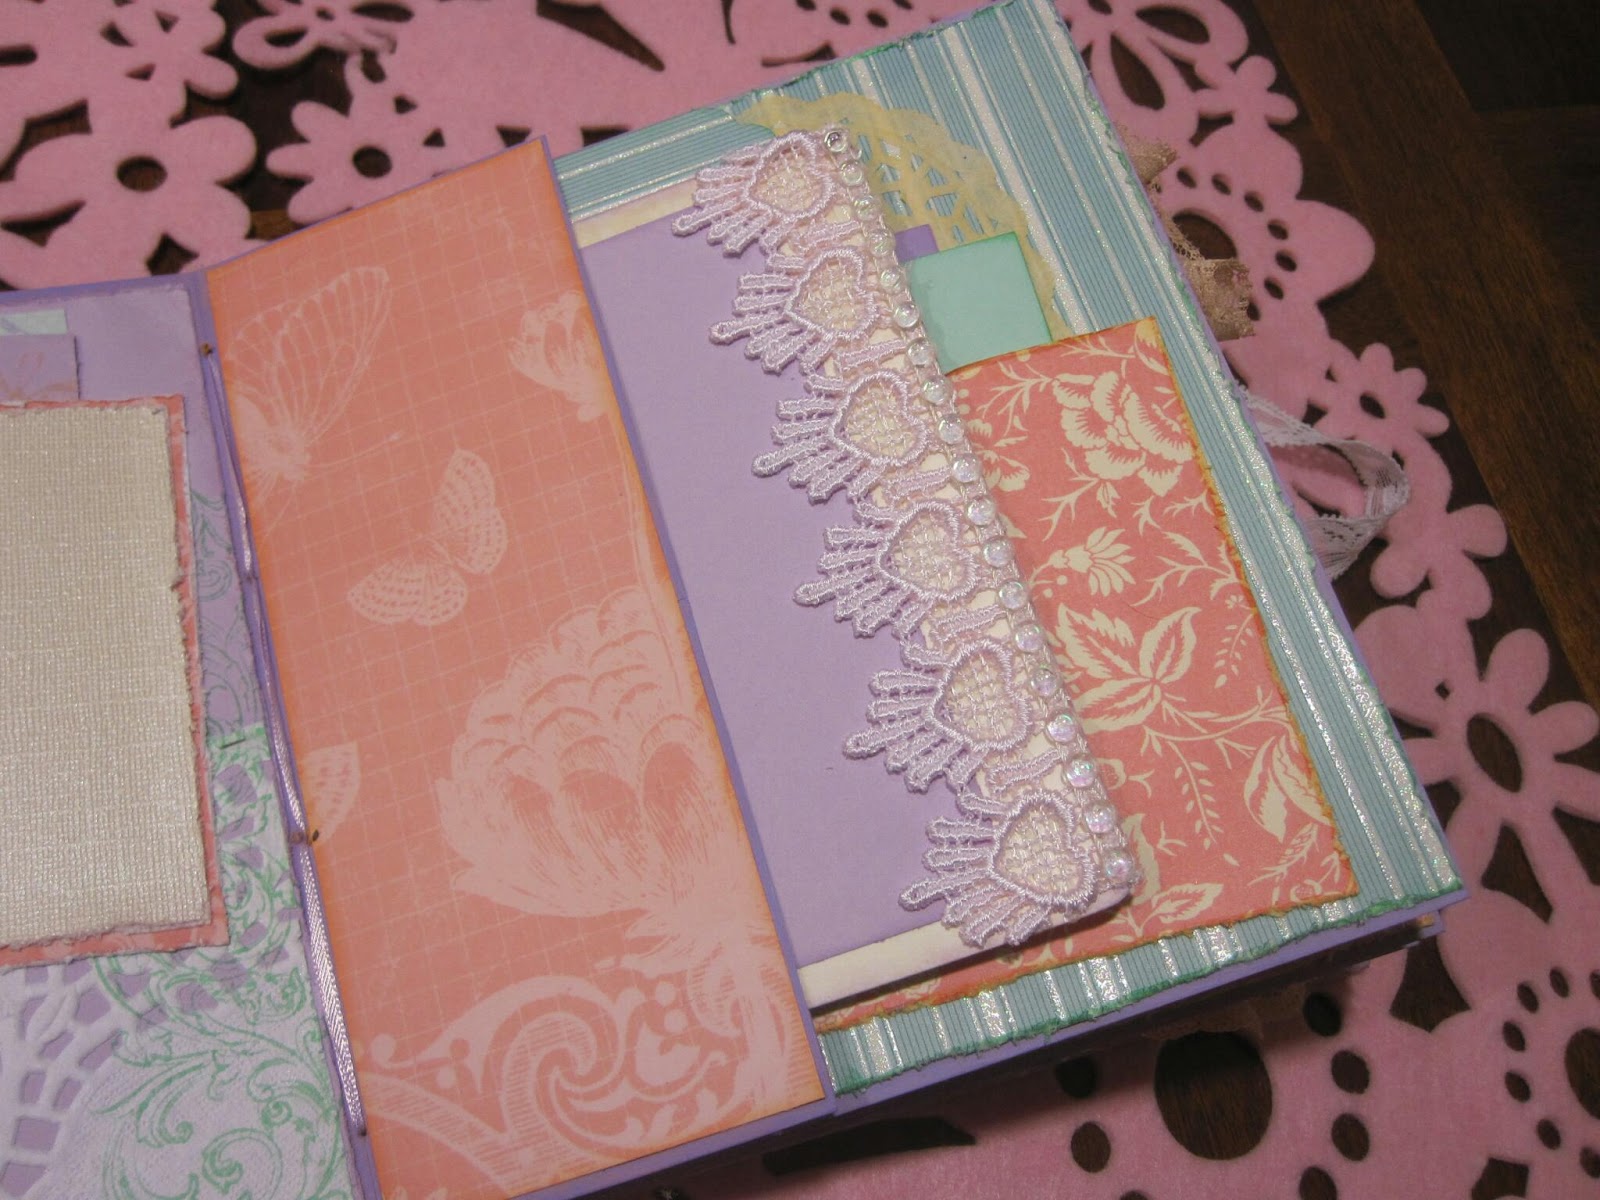
My latest project....a mini album for a soon to be bride.
Her wedding colors are Peach, Lavender and Mint. This was the first time working with these colors and love how the album came out...for the most part. I seem to have misplaced my mojo, lol.
And with that note...I have neglected my blog for quit some time and hadn't realized this was sitting in my drafts along with a couple others. So for now, I'll just post and get it over with. And it now NOT my latest project...
Ok, so I haven't kept my blog updated as much as I wanted. But i do want to share this project I'm working on for a challenge...it's going to be amazing!!!
This was a gift for a new friend in Canada (ScrapAtizer on YouTube). I was so excited to try something new and definitely from scratch. I used bling, lace, design paper, flower, modeling paste (for the very first time) and so much more for this project. I know some of the paper was DCWV - Mariposa but I can't tell for sure on the others. I just grabbed paper from all sorts of stacks.
I had so much fun making this little lace box and look forward to making more.
I'm almost at 250 subbies on YouTube (Luane Kash) and I may just make one as part of a giveaway...I love giveaways!!
In this video...because I have tons of videos, I go over how to make your own flourishes or bling embellishments...I know it easy to just buy them...many times I run across needing a specific color that is just not provided...
So I started making my own. Since this video I've done them in different color and have made my own little swirls to fit my current project. One of my favorite things to do is make flower centers.
I still stand by my pick up pencil...it's amazing for these types of little pieces and are available in my ETSY shop.
Some time ago I came up with an idea of putting together a waterfall page but without the actual working "pull tab". What I came up with was the Floating Waterfall Page. I also wanted to still see the actual background paper.
Almost all the time we use the prettiest of papers and we cover them up with embellishments and photo mats and all that other yummy goodness. So, I figured why not work around that so I can still take advantage of the beautiful paper.
Below is the video tutorial on how I made my Floating Waterfall Page.
This is one of my favorite types of paper flowers...so far...I may discover other favorites soon.
I was playing around with my paper doilies and had seen lots of other tutorials on these but I wasn't getting them right…so, I decided to just wing it and I came up with a super cute..and fluffy paper doily flower.
I played with different sizes and even attempted to make one with the heart doily…that was no bueno.
The doilies that I used are listed on my ETSY shop.I have different styles of doilies in different sizes as well.
Ok, so I'm gonna try to not over type this time...I said try...
I have a new Shabby Flower Tutorial up. I love the way this flower comes out, they always come out different. I can never make them the same because I'm always trying to make them different...geez.
I used a Tim Holtz die, Tattered Florals ~ love this die.
Here the video to my tutorial. Hope y'all find it useful/helpful.
Below is my new version on how to make a shadow box.I came up with this idea while wandering around my hubby's office at work (we work together…yay).He had some sort of envelope shadow box type deal for a software code and the inside looked just like a shadow box…I thought it was kind of awesome.So I went back to my desk and made a mock one from copy paper…yeah copy paper.
Later I went home and made one with chip, then another and another, all different sizes.
The measurements fot the shadow box in the video is 3x4 on the inside and 4x5 on the outside.I've listed the measurements below for this particular size with a .25 tab for gluing it all down.If you need the tab to be larger you'll need to adjust your measurements.
Score on the short side (this matters if your using an 8.5x11 piece of chipboard or cardstock…and that's exactly what I used on the tutorial).
.25
.75
1.25
1.75
The above score lines will give you your (in order top to bottom) glue tab, inner wall, top wall and outside wall.
Once you have detemined how wide or tall you want the inside of your shadow box to be you will work into that measure another inch split in half.So you have a half inch, plus the inside space you desire, plus another half inch.
So, from 1.75 your next starting point is 2.25, you will not score on 2.25.From there you will go out however wide or tall you want the inside of your shadow box to be.In the tutorial I'm going for a 3x4 inside space.so my next score line will be at 5.75.Again, my formula for that is half inch form the last score line of 1.75, plus 3 inches, plus another half inch.
These are the next score lines, same side we've been scoring.
5.75
6.25
6.75
7
The above score lines will give you the outside wall, top wall, inner wall and glue tab. You can cut the excess off or just at 7 inches.
To score the long side, rotate your paper/chipboard and score at on the following measurements:
.25
.75
1.25
1.75
Same as the first section.
Your next score line will be at 6.75, half inch, plus 4 inches, plus another half inch get's you to 6.75.
Last score line set:
6.75
7.25
7.75
8
Cut the excess or at 8 inches.
Your overall size will be 7x8, I don’t start off with that size, I typically will start with a whole sheet incase I decide to go bigger or smaller.
You will now have 4 tiny score lines to make.To me it doesn't matter what sides I score.
You will need to score at 2.25 down through your tab and up to the second horizontal score line which should be at .75 inches.So, over 2.25 and down .75 and then again a half inch before the next set of score lines that you have.So depending on the sides you are scoring it could be at 5.25 or 6.25.All of your score lines with the exception of the tabs sould be half inch apart.So you'll score the instruction just noted on the top and bottom only, not all sides.
From here you'll need to cut throught the small score you just did and when you get to the .75 score line or your second score line you will cut it at an angel to the edge of the next score line.
Fold all your score lines. Glue down the two sides that have not been cut in an angle first. Tab is glued to the inside of the shadow box. Do this on both sides.
Before you glue down the next two sections that have the angled cut, fold it over to make sure it's not super snug.You don’t want the sides with the angle cut to push the other walls out, it wont look good.If you need to cut a smidgen this is the time to do it.
If you want to add some ribbon to hang your shaddow bow now is the time to do it as well.
Now you can glue your last two tabs down to finish the assembly of your shadow box.Ensure to add glue to the inside corners of the walls you've allready glued down.This will firm up your shadow bow and secure all sides together.
And viola!!! your done.
Thank you so much for watching and or reading…happy crafting!!!
Here I have the single pendant I created for a YouTube challenge entry for craftychica87's 2 year YouTube anniversary...yikes, what a mouth full.
This beautiful fairy is from The Paper Shelter, Make a Wish. I colored her in with my Spectrum Noir...unfortunately I do not have the color combos I used...I usually try to jot them down.
The laces I used are laces from my Etsy Shop. Flowers are from I am Roses and Wild Orchid Crafts. I painted them with my Lindy's and some homemade sprays. Holy smokes do I have a lot of links - hehehe
I had so much fun making this Pendant. I also didn't want it to be just a pendant so I made into a would be card with an additional pocket on the back. I did finish up the back. I've never done one of these Pendants so I didn't really know what to do to the back...so I just finished it up. Lots of pics...I know, but I really love how it came out...